What Is a Solar Power Charge Controller?
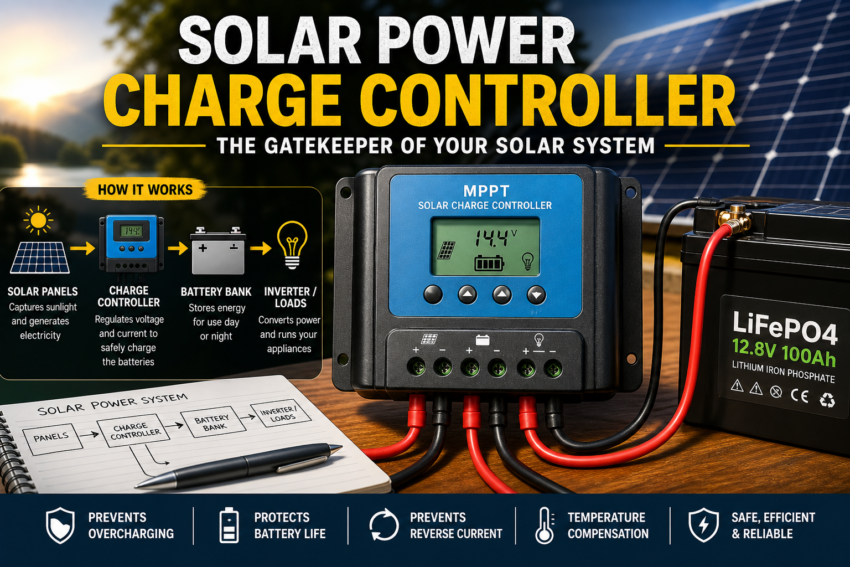
A solar power charge controller — also called a solar regulator — is the device that sits between your solar panels and your battery bank. Its job is to regulate the voltage and current coming from the panels and deliver it to your batteries in a safe, controlled way.
Here’s how a basic solar system flows:
Solar panels → Charge controller → Battery bank → Inverter / loads
Without a charge controller, solar panels would push unregulated power directly into your batteries. That leads to overcharging, overheating, and ultimately destroyed batteries. A charge controller prevents that — and it also stops batteries from pushing current back through the panels at night, a process called reverse current flow that can damage your panels over time.
Think of it as the gatekeeper of your solar system. Every watt that flows from your panels to your batteries passes through it, and it makes sure that power arrives cleanly and safely.
How a Solar Charge Controller Works
Understanding what’s happening inside a charge controller makes it a lot easier to choose the right one. When your panels are generating power, the controller feeds it into your battery in stages:
Bulk stage: The battery is low, so the controller sends maximum current to charge it as fast as safely possible. This covers roughly the first 80% of a charge cycle.
Absorption stage: The battery is getting close to full. The controller holds voltage steady and gradually reduces current to avoid overcharging — like easing off the accelerator as you approach a speed limit.
Float stage: The battery is full. The controller drops to a maintenance-level trickle charge just enough to keep the battery topped up without overcharging it.
Equalization stage (lead-acid only): Periodically, the controller runs a controlled overcharge to balance cell voltages and remove sulfation in lead-acid batteries. This doesn’t apply to lithium batteries.
Beyond charging, most controllers also provide overcharge protection, over-discharge protection, short circuit protection, reverse polarity protection, and temperature compensation to automatically adjust charge voltage for longer battery life.
MPPT vs. PWM — The Most Important Decision You’ll Make
Every solar charge controller uses one of two technologies: PWM or MPPT. This is the single most important spec to understand before buying.
PWM (Pulse Width Modulation)
PWM is the older, simpler technology. As your battery fills up, the controller pulses the connection between panels and battery — rapidly switching on and off to control energy flow. It’s reliable and inexpensive, but it requires the panel voltage to closely match the battery voltage. Any excess voltage is wasted as heat, which means real energy losses in most setups.
MPPT (Maximum Power Point Tracking)
MPPT controllers are smarter. They track the exact voltage and current combination that produces maximum power from your panels, then convert and deliver that power at the battery’s optimal charging voltage. The result is 20–30% more energy harvested from the same panels — especially in cold weather, partial shade, or when panel voltage is significantly higher than battery voltage.
| Feature | PWM | MPPT |
|---|---|---|
| Efficiency | 70–80% | 93–99% |
| Panel voltage flexibility | Must be close to battery voltage | Works with much higher panel voltage |
| Cold weather performance | Reduced | Excellent |
| Partial shade performance | Poor | Good |
| Cost | $15–$60 | $80–$300+ |
| Best system size | Under 200W | 200W and above |
| Complexity | Simple setup | More features, more settings |
The clear recommendation: For any system with 200W or more of solar panels, go MPPT. The efficiency gains pay for the price difference within one or two seasons. PWM only makes sense for very small, budget systems — trickle chargers, tiny setups under 100W, or situations where cost is the only factor.
How to Size a Solar Charge Controller Correctly
Getting the size right is critical. Too small and you risk damaging the controller. Too large and you’ve wasted money. Here’s the formula:
Minimum controller amps = Total panel wattage ÷ System voltage × 1.25
The 1.25 multiplier adds a 25% safety buffer — controllers shouldn’t run at 100% capacity continuously.
| Panel Wattage | System Voltage | Minimum Controller Size |
|---|---|---|
| 100W | 12V | 10.4A → 15A controller |
| 200W | 12V | 20.8A → 30A controller |
| 400W | 12V | 41.7A → 40A or 50A controller |
| 600W | 24V | 31.3A → 40A controller |
| 800W | 24V | 41.7A → 50A or 60A controller |
| 1,000W | 48V | 26.0A → 30A controller |
Most common mistakes:
- Running a controller right at its maximum rated amps continuously — always leave headroom
- Ignoring the panel’s open-circuit voltage (Voc) — it must not exceed the controller’s max PV input voltage
- Buying for current capacity only without checking voltage compatibility
Planning for expansion: If you might add more panels later, buy a controller with room to grow now. Replacing it later costs more than sizing up once upfront.
What to Look for When Buying a Solar Charge Controller
Amperage rating
This is the maximum current the controller can handle from your panels. Use the sizing formula above to find the minimum you need, then round up to the next standard size (10A, 20A, 30A, 40A, 60A).
Maximum PV input voltage
Your panel’s open-circuit voltage (Voc) must stay below the controller’s maximum PV input voltage. Exceed this and you permanently damage the controller — no exceptions. Common ratings are 75V, 100V, and 150V.
System voltage compatibility
Most controllers support 12V and 24V systems. Higher-end units support 12V/24V/36V/48V. Make sure your controller matches your battery bank voltage.
Battery type support
Different batteries need different charge profiles. Check that your controller explicitly supports your battery chemistry — especially important for LiFePO4 lithium batteries, which need a specific charge profile that not all controllers provide.
Display and monitoring
A clear LCD display showing input wattage, battery voltage, charge state, and error codes is very useful. Built-in Bluetooth or WiFi for smartphone monitoring is a major convenience — especially for remote or hard-to-access systems.
Temperature compensation
Batteries need different charge voltages in hot and cold conditions. A controller with a temperature compensation sensor automatically adjusts for this, meaningfully extending battery life.
Brand and warranty
Stick to established brands with real customer support. Victron, Renogy, EPever, and ECO-WORTHY all have proven track records. Avoid no-name controllers where amperage ratings are often exaggerated and failure rates are higher.
Best Solar Charge Controllers on Amazon in 2025
| Model | Type | Amps | Max PV Voltage | Monitoring | Price | Best For |
|---|---|---|---|---|---|---|
| Victron SmartSolar 100/30 | MPPT | 30A | 100V | Bluetooth app | ~$185 | Best premium |
| Renogy Rover 40A | MPPT | 40A | 100V | LCD + optional BT | ~$110 | Best overall |
| EPever Tracer AN 40A | MPPT | 40A | 150V | LCD + optional BT | ~$85 | Best value MPPT |
| Renogy Wanderer Li 30A | PWM | 30A | 25V | LED indicators | ~$35 | Best budget |
| ECO-WORTHY 60A MPPT WiFi | MPPT | 60A | 150V | Bluetooth + WiFi | ~$130 | Best large system |
Victron SmartSolar MPPT 100/30 — Best Premium Pick
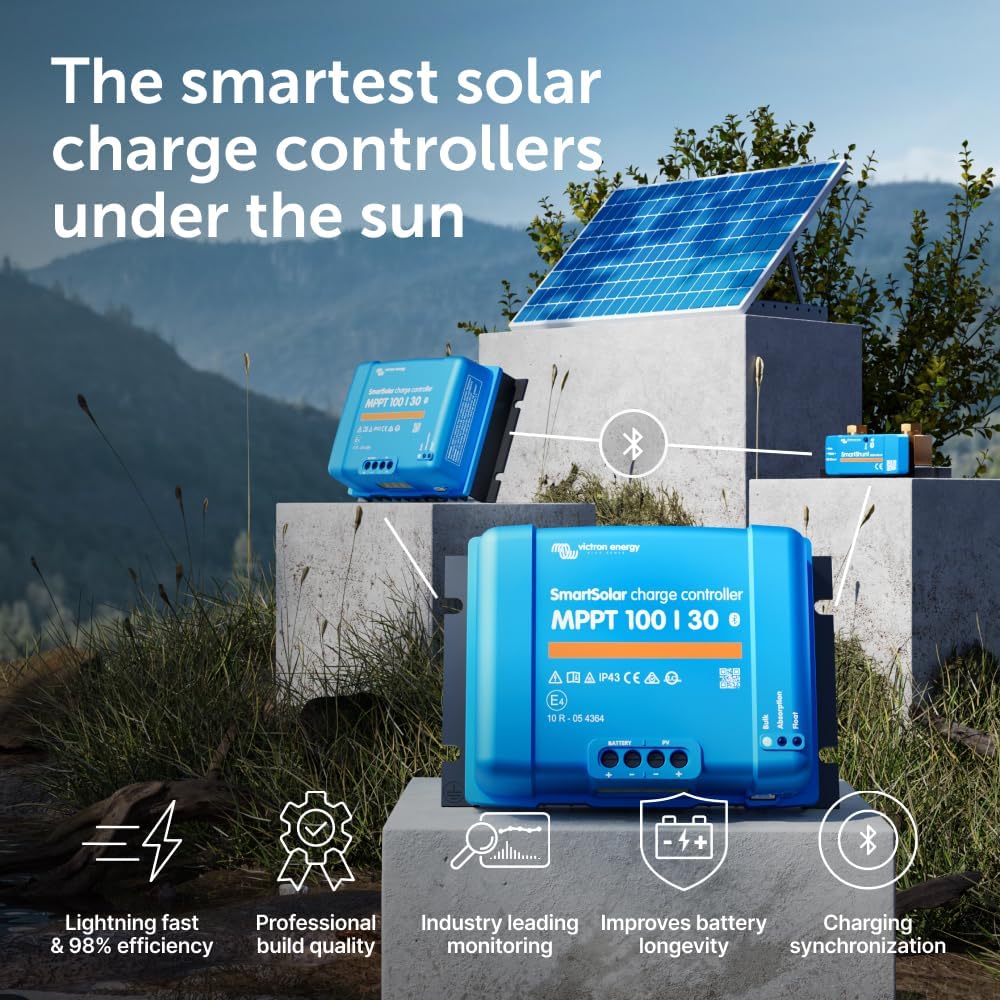
Victron Energy is the professional’s choice in solar — used by installers, marine electricians, and off-grid builders worldwide. The SmartSolar 100/30 earns a 4.8-star rating on Amazon from thousands of verified reviews and consistently tops independent expert tests for power output and reliability.
What sets it apart is the software. The VictronConnect app (iOS and Android) gives you real-time monitoring, full system history, firmware updates, and complete configuration control — all over Bluetooth with no additional hardware required. It handles up to 30A charge current with a 100V max PV input, covering up to 400W on 12V or 800W on 24V. All battery types including LiFePO4 are fully supported with customizable charge profiles.
Pros: Industry-best app, exceptional build quality, fully customizable profiles, 5-year warranty, best-in-class long-term reliability
Cons: Premium price — roughly double the cost of comparable Renogy units
Best for: Serious off-grid builds, van life, marine applications, and anyone building a system they want to last 10+ years without headaches
Renogy Rover 40A MPPT — Best Overall
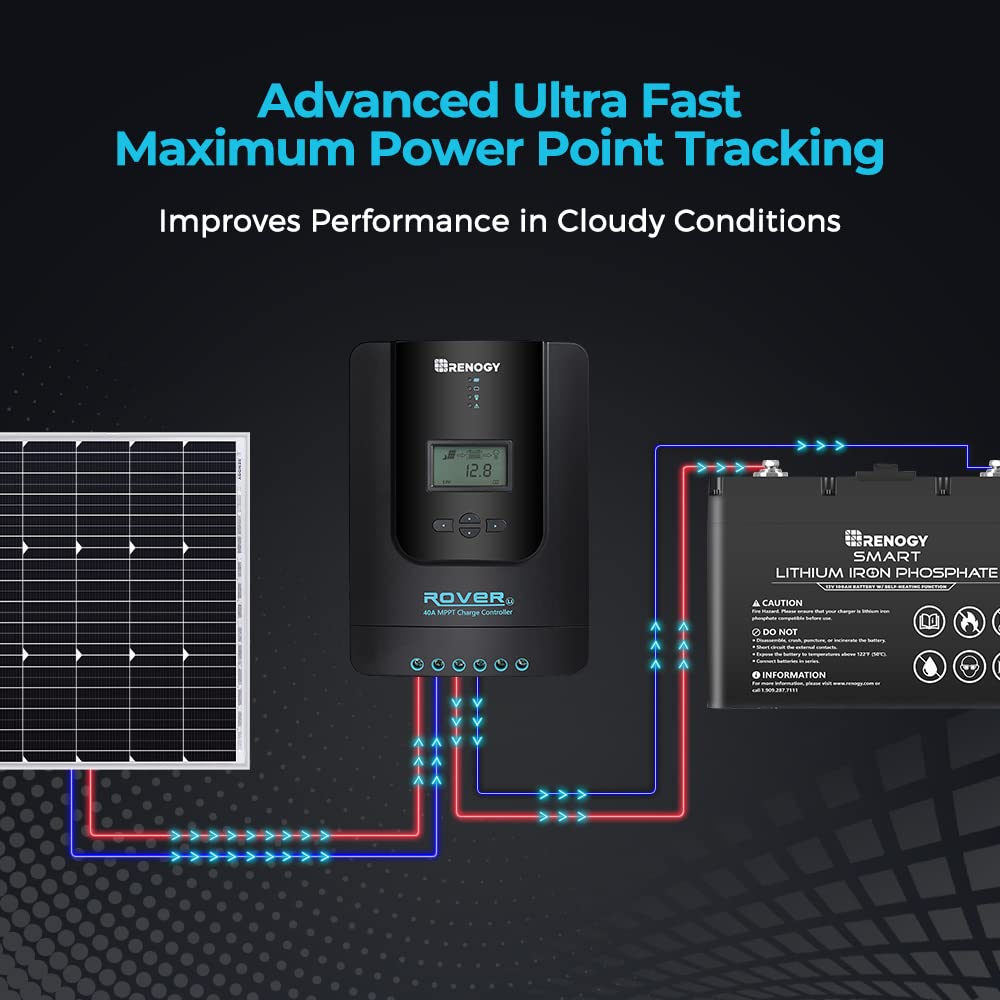
The Renogy Rover 40A is the most popular solar charge controller on Amazon — and it earns that position. It handles up to 400W of panels on a 12V system (800W on 24V), supports all battery types including LiFePO4, and comes with a clear backlit LCD showing real-time input/output data, battery voltage, and charging status.
The Rover Elite version adds built-in Bluetooth for the Renogy DC Home app — well worth the small premium if you want phone monitoring. Renogy’s US-based customer support is responsive and their installation documentation is the clearest in the business, making this the go-to recommendation for DIY solar beginners and experienced builders alike. At around $110, it hits the sweet spot of price, performance, and reliability better than anything else at this size.
Pros: Best-selling for a reason, supports LiFePO4, clear LCD, optional Bluetooth, excellent Renogy support, strong value
Cons: App is less polished than Victron’s; standard version requires separate Bluetooth module
Best for: The vast majority of home, RV, van, and off-grid cabin systems with up to 400W of panels on 12V
EPever Tracer AN 40A MPPT — Best Value MPPT
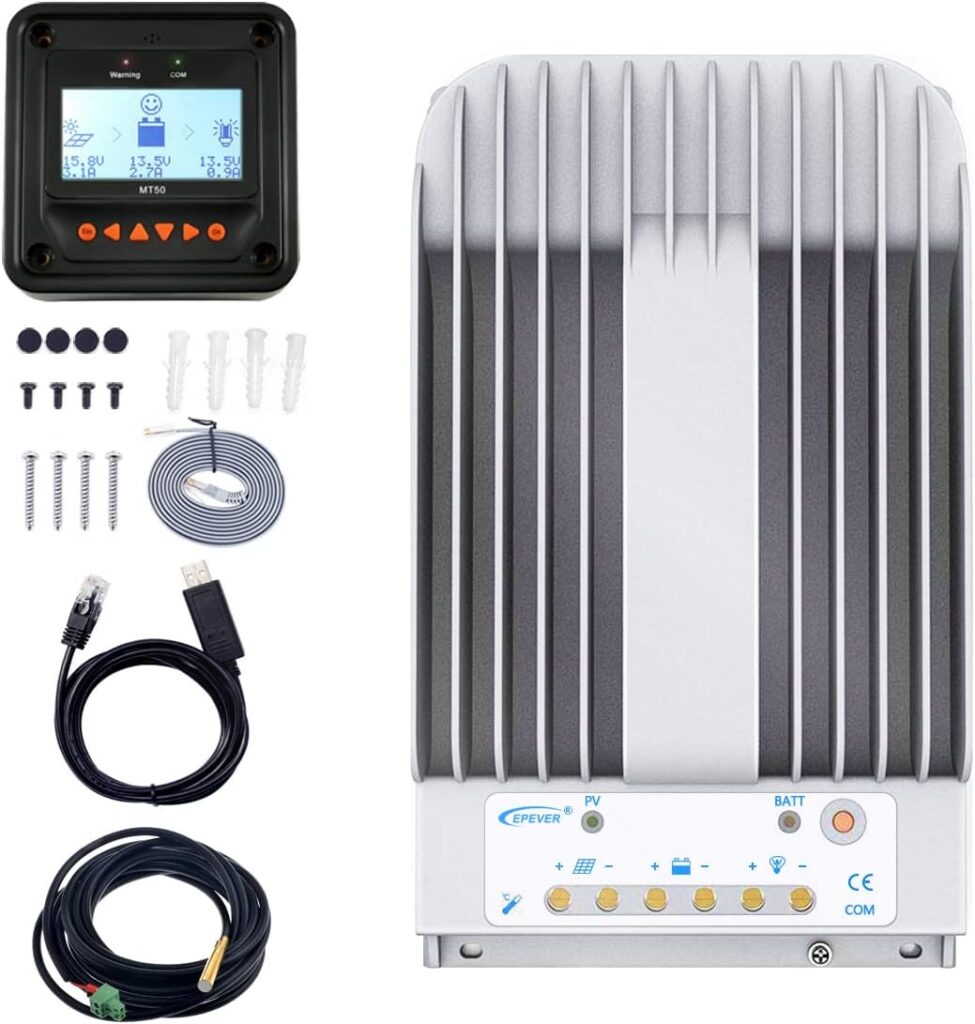
EPever’s Tracer AN series is well-regarded in the solar DIY community and a genuine alternative to Renogy at a lower price point. The 40A model handles the same panel loads as the Renogy Rover, supports LiFePO4, and accepts up to 150V PV input — giving you more flexibility in how you wire panels in series. An MT50 remote display is available separately for full monitoring.
The main trade-off is that Bluetooth connectivity requires a separate dongle at around $15–20 extra. Factor that into your cost comparison.
Pros: Lower price than Renogy, 150V PV input for more panel wiring flexibility, LiFePO4 compatible, solid reliability
Cons: Bluetooth requires separate purchase, thinner English-language support documentation
Best for: Budget-conscious builders who want full MPPT performance without paying the Renogy or Victron premium
Renogy Wanderer Li 30A PWM — Best Budget Pick
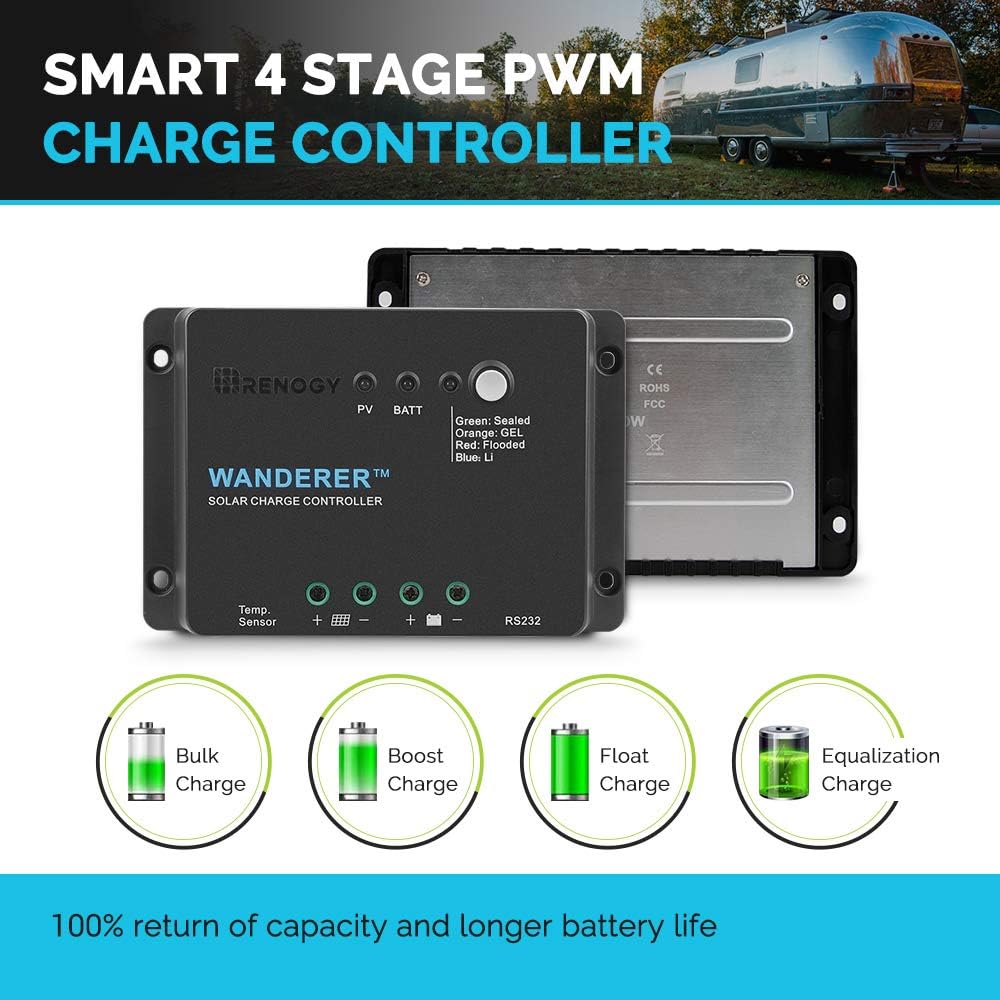
For small systems under 200W where budget is the primary concern, the Renogy Wanderer Li is the safest budget pick on Amazon. At around $35 it’s one of the most affordable controllers from a reputable brand — and the updated “Li” version now supports LiFePO4 batteries, which older Wanderer models didn’t.
It uses LED indicators rather than a full LCD display, so monitoring is basic. Bluetooth monitoring is available via the Renogy BT-1 module (sold separately). Note that the 25V max PV input means panels must be wired in parallel rather than series — keep that in mind for your wiring plan.
Pros: Very affordable, Renogy brand reliability, LiFePO4 compatible, compact and lightweight
Cons: PWM technology (less efficient than MPPT), 25V max PV input limits wiring options, no built-in display
Best for: Small systems under 200W, shed setups, budget-first buyers, and anyone just getting started with solar
ECO-WORTHY 60A MPPT with Bluetooth & WiFi — Best for Large Systems
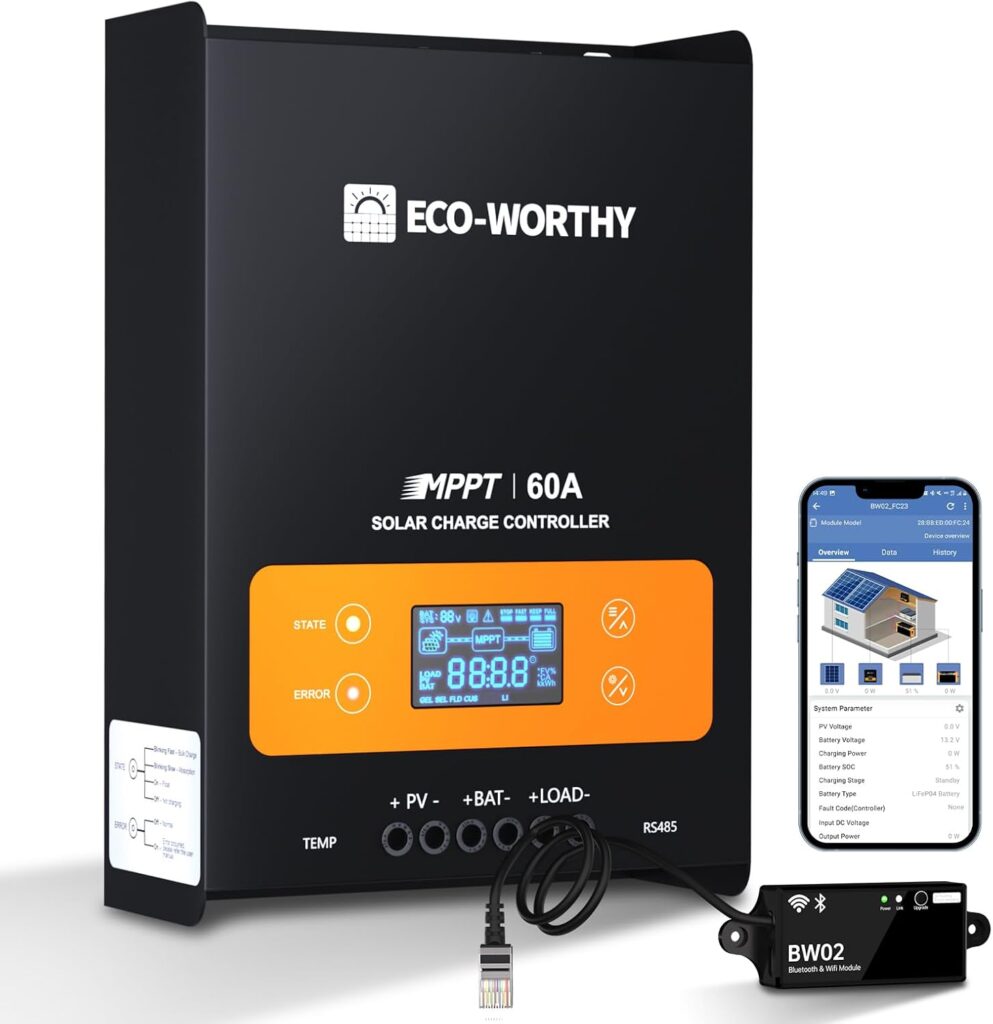
For systems with 600W or more of solar panels, the ECO-WORTHY 60A MPPT is the standout value on Amazon. It handles up to 150V PV input and 60A charge current — covering up to 800W on 12V or 1,600W on 24V — and includes both Bluetooth and WiFi monitoring built in, with no extra modules required.
The WiFi connectivity is a genuine differentiator at this price point. With WiFi, you can monitor your system remotely from anywhere through the app — not just when you’re within Bluetooth range. It supports all battery types including LiFePO4, and the LCD display is clear and informative.
Pros: Built-in Bluetooth AND WiFi with no extra hardware, 60A handles large systems, 150V PV input, LiFePO4 compatible, good value
Cons: Newer brand with less of a track record than Victron or Renogy
Best for: Large RV, off-grid home, or cabin systems with 600W+ of solar panels where remote monitoring matters
How to Wire a Solar Charge Controller — Step by Step
Step 1 — Connect the battery first
Always connect battery to controller before anything else. This initializes the controller correctly. Connecting panels first can cause voltage spikes that damage the unit.
Step 2 — Connect solar panels
After the controller has initialized from the battery connection, connect the panels to the PV input terminals.
Step 3 — Connect loads (if using the load output)
Some controllers have a dedicated 12V load output with automatic low-voltage disconnect. Connect DC loads here for built-in over-discharge protection.
Always fuse the positive wire close to the battery. A fuse between the battery positive terminal and the controller is a critical safety requirement — not optional. Use a fuse rated to match the controller’s amperage.
Wire gauge guide:
| Current | Max Distance (one way) | Wire Size |
|---|---|---|
| Up to 20A | Under 10 ft | 12 AWG |
| Up to 30A | Under 10 ft | 10 AWG |
| Up to 40A | Under 10 ft | 8 AWG |
| Up to 60A | Under 10 ft | 6 AWG |
Series vs. parallel panel wiring:
Wiring panels in series increases voltage — good for MPPT controllers and longer cable runs. Wiring in parallel increases current and keeps voltage the same — better for partial shade situations and required for PWM systems. Always check that your wiring configuration stays within the controller’s max PV input voltage.
Common Solar Charge Controller Mistakes to Avoid
Exceeding max PV input voltage. This is the most destructive mistake — it instantly and permanently damages the controller. Always calculate your panel array’s open-circuit voltage (Voc) and confirm it stays below the controller’s limit, including the 10–15% voltage increase that happens in cold weather.
Undersizing the controller. Running a controller at 100% of its rated amps continuously shortens its lifespan significantly. Always apply the 1.25x safety buffer when sizing.
Skipping the battery-first wiring sequence. Connecting panels before the battery causes voltage spikes that can fry the controller’s electronics.
Not fusing the battery connection. An unfused wire between battery and controller is a fire hazard. Always fuse as close to the battery terminal as possible.
Using the wrong battery profile. Setting your controller to AGM mode when you have lithium (or vice versa) will either undercharge or overcharge your battery. Always verify the battery type setting after installation.
Mounting in a sealed, unventilated space. Charge controllers generate heat and need airflow. A controller crammed in a sealed cabinet will overheat and fail prematurely.
Frequently Asked Questions
Do I always need a charge controller?
Yes — for any panel over about 5W. For any real solar setup, a charge controller is non-negotiable. Without one, unregulated power from your panels will overcharge and eventually destroy your batteries.
Can I use any charge controller with any battery?
No. You need to match the controller’s supported battery types to your specific battery chemistry. Most modern controllers support sealed, gel, flooded lead-acid, and LiFePO4 — but always verify before buying, especially for lithium batteries.
What happens if my charge controller is too small?
The controller will overheat, throttle its output, and likely fail prematurely. In the worst case it can damage your battery by delivering unregulated power. Always size with the 1.25x safety buffer formula.
Can I connect two charge controllers to one battery?
Yes — and it’s a common way to expand a solar system without replacing the existing charge controller. Both controllers will regulate independently and share the battery bank. Make sure both controllers’ battery type settings match.
How long does a solar charge controller last?
A quality MPPT controller from a reputable brand — Victron, Renogy, EPever — should last 10–15 years in normal use. Cheaper no-name units often fail within 2–3 years. Buy quality once and you won’t have to think about it again.
Final Verdict — Which Solar Charge Controller Should You Buy?
| Use Case | Best Pick |
|---|---|
| Best premium / long-term build | Victron SmartSolar MPPT 100/30 |
| Best overall for most systems | Renogy Rover 40A MPPT |
| Best value MPPT | EPever Tracer AN 40A MPPT |
| Best budget / small systems | Renogy Wanderer Li 30A PWM |
| Best for large systems (600W+) | ECO-WORTHY 60A MPPT WiFi |
| Best for LiFePO4 lithium batteries | Victron SmartSolar MPPT 100/30 |
| Best for beginners | Renogy Rover 40A MPPT |
Our top pick for most people: Renogy Rover 40A MPPT
It covers the panel loads of the vast majority of home, RV, van, and off-grid setups. It supports all battery types including LiFePO4. The LCD is informative, the setup is straightforward, and Renogy’s support infrastructure is the best in the consumer solar market.
If you’re building a serious, long-term off-grid system and want the best reliability money can buy, spend the extra on the Victron SmartSolar. If you have a large panel array and want WiFi monitoring, the ECO-WORTHY 60A delivers serious specs at a fair price. And if you’re just getting started with a small setup, the Renogy Wanderer Li at $35 is all you need.
The charge controller is the brain of your solar system. Get it right and your whole system performs better, lasts longer, and gives you fewer headaches. It’s not where you want to cut corners.